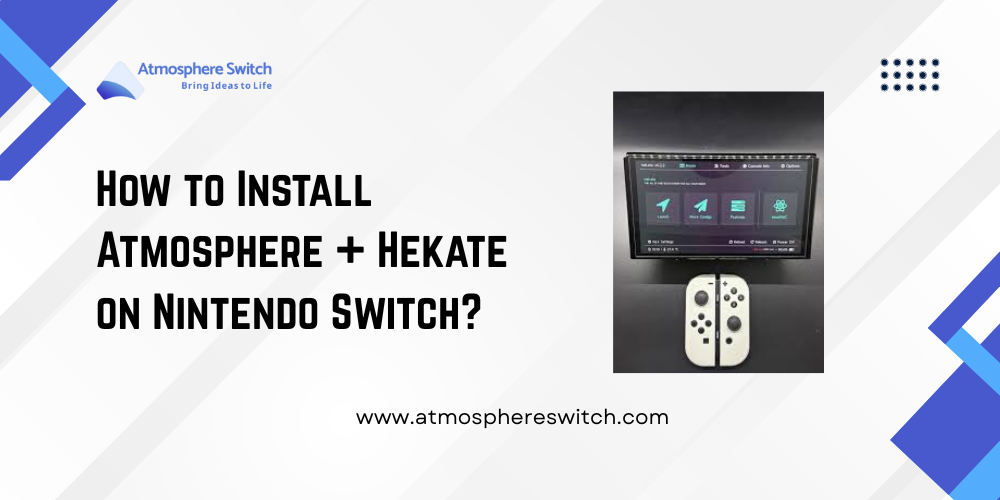
Introduction
Congratulations on taking the plunge into the world of Custom Firmware (CFW)! The duo of Hekate (the powerful bootloader) and Atmosphere Switch (the Custom Firmware itself) forms the foundation of nearly every successful Switch mod. This process allows for Emulation, system backups, customization, and safely separates your modded activities from your online profile.
This guide provides a meticulous, step-by-step walkthrough specifically for the V1 (unpatched) Nintendo Switch, which relies on the software-based RCM (Recovery Mode) exploit. We will prioritize safety by focusing on creating an isolated operating environment, the EmuMMC.
Critical Safety Warning: Modding your Switch carries the inherent risk of a console ban from the Nintendo Network. Follow the steps precisely. Creating an EmuMMC (an emulated OS copy on your SD card) is non-negotiable for modern safety protocols. Proceed entirely at your own risk.
Phase 1: Preparation – Essential Downloads and SD Card Formatting
The success of your installation hinges on meticulous preparation. Do not skip the correct formatting or file gathering steps.
The Modding Toolkit: Hardware and Software Requirements
Hardware Checklist
- A Compatible Nintendo Switch: Must be an unpatched V1 model. Use a serial number checker tool (available online) to confirm your console is vulnerable to the RCM exploit.
- MicroSD Card: A high-quality card is paramount. Minimum 128GB recommended, as the EmuMMC alone can take up to 32GB of space.
- Crucial: Avoid counterfeit or generic cards; they often fail during the NAND backup process.
- RCM Jig: A small tool to short the required pins on the right Joy-Con rail to enter RCM.
- USB-C Data Cable: Ensure it is a data-sync cable, not a cheap charging-only cable.
- PC/Laptop: Required for initial setup, file transfer, and payload injection.
Required Software Downloads (The Core Trinity)
Download the latest stable releases of these components from their official GitHub pages. Place them all in a new, empty folder on your desktop.
- Atmosphere: The core CFW. Download the main ZIP file.
- Hekate – CTCaer Mod: The essential bootloader/payload injector tool. Download the compressed ZIP file, which contains the bootloader files and the necessary .bin payload.
- TegraRCMGUI: (Windows Users) This desktop application is used to install the necessary drivers and “push” the Hekate payload to your Switch. (Mac/Linux users will use fusee-launcher or a similar tool).
- Sigpatches (Signature Patches): (Advanced/Essential Topic) These are critical files that patch Atmosphere to allow the installation and launching of unauthorized software (like homebrew apps or backups). They are not officially provided by the Atmosphere developers and must be sourced from community repositories. Do not proceed without these.
Phase 2: SD Card Configuration and File Structure
The file structure on your MicroSD card must be perfect. An incorrect file path will prevent both Hekate and Atmosphere from booting.
Formatting and File System Choice (FAT32 vs. exFAT)
- Backup: Back up any existing files, as this process will wipe your card clean.
- Format: Format the MicroSD card as FAT32. While the Nintendo Switch supports exFAT, the FAT32 file system is significantly more stable in the CFW environment, preventing data corruption during system crashes. Use a third-party tool like GUIFormat for formatting large cards to FAT32, as Windows’ built-in utility often restricts FAT32 to smaller sizes.
Transferring the CFW Files (The Root)
- Unzip and Merge: Extract the contents of the Atmosphere ZIP file and the Hekate ZIP file.
- Root Transfer: Copy the contents of the extracted folders (not the folders themselves, but their contents) directly to the root of your MicroSD card. This will include folders named atmosphere, bootloader, and various configuration files. Overwrite or merge any files if prompted.
- Install Sigpatches: Extract the contents of your Sigpatches package and copy them over the existing atmosphere folder on your SD card, overwriting files when asked. This is how you integrate the required patches into the Atmosphere Switch CFW.
- Rename Payload: Locate the main Hekate payload file (e.g., hekate_ctcaer_x.x.x.bin). Copy this file to your computer’s desktop and rename it simply to payload.bin. This is the file you will inject repeatedly.
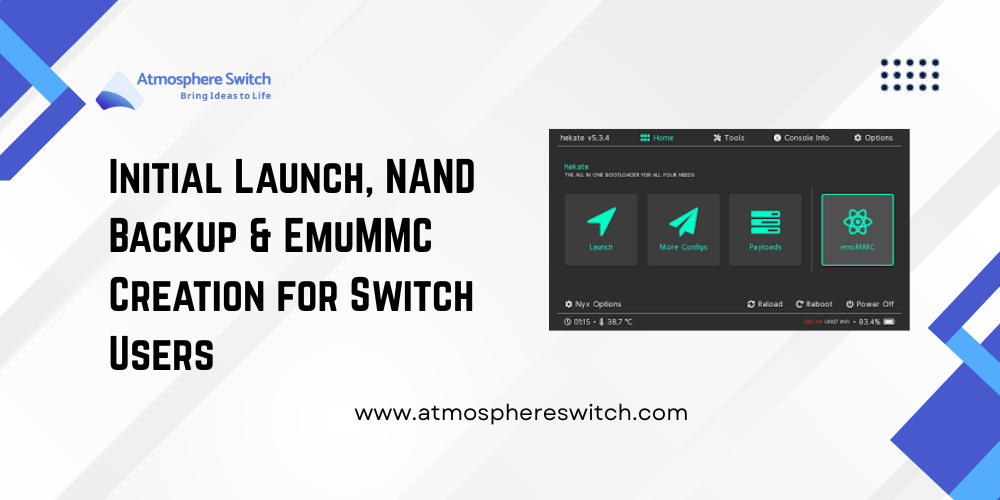
Phase 3: Initial Launch, NAND Backup & EmuMMC Creation for Switch Users
This is the most time-consuming and irreversible phase. A successful NAND backup is your only protection against a hard brick.
Entering RCM (Recovery Mode) and Injecting Hekate
- System Power-Off: Hold the power button for three seconds, select Power Options, and choose Turn Off.
- RCM Pin Shorting: Insert the RCM Jig into the right Joy-Con rail. Hold the Volume Up (+) button, press the Power button once, and then release both buttons. The screen will remain black, confirming RCM.
- Payload Injection: Connect the Switch to your PC via the USB-C cable. Launch TegraRCMGUI.
- Driver Check: If TegraRCMGUI shows “RCM O.K.,” you are good to go. If not, install the APX Driver via the Settings tab.
- Inject: Select the payload.bin file you prepared and click Inject Payload.
The Switch should boot into the Hekate bootloader (Nyx GUI).
The Critical NAND Backup
This step clones your original system files and keys. DO NOT SKIP THIS.
- Navigate to Tools: In the Hekate menu, tap Tools.
- Backup: Tap Backup eMMC.
- Select All: Select eMMC BOOT0/1 and eMMC RAW GPP.
- Start Backup: Tap Start Backup. The process is slow (up to an hour). Do not interrupt it.
- Secure Storage: Once complete, eject the SD card and copy the entire backup folder to a secure, external location (cloud drive, external HDD). Delete the backup from your SD card to free up space, as it is no longer needed there.
Setting up the EmuMMC (The Safety Sandbox)
EmuMMC (Emulated MultiMediaCard) is the core safety feature—a clone of your system’s NAND running entirely from the SD card.
- EmuMMC Menu: From the Hekate main menu, tap emuMMC.
- Create: Tap Create emuMMC.
- Type: Choose SD File or SD Partition. SD Partition is often preferred for slightly better performance but may require reformatting the entire card later if you want to remove it. Select your preferred method.
- Creation: Hekate will create the clone. This process takes 10–30 minutes. Once done, Hekate will display a confirmation.
- Verification: Go back to the emuMMC screen and ensure the status shows “Enabled” and the correct EmuMMC partition is selected.
Phase 4: First Boot into Atmosphere Switch CFW
The EmuMMC is set up. Now we boot into the clean, custom environment.
Launching Atmosphere Switch CFW
- Launch Menu: From the main Hekate menu, tap Launch.
- Select CFW: You will see a boot entry labeled for CFW (EmuMMC) or Atmosphere EmuMMC. Select this entry.
- Atmosphere Splash: The console will display the Atmosphere splash screen (often a custom boot logo) before loading the standard Nintendo Switch home screen. Congratulations—you are now running CFW on your EmuMMC!
The Dual-Boot System and Online Safety
- CFW (EmuMMC): You should now primarily use this environment for all modded activities, Emulation, and homebrew. NEVER connect this partition to the internet (download updates, access the eShop, play online). Use stealth tools like 90DNS or Exosphere patches to ensure this partition cannot contact Nintendo’s servers.
- OFW (SysNAND): To play your legitimate games online, fully power off the Switch, then power it back on without injecting the payload. This boots the original, clean system. Only connect to the internet in this clean environment.
Troubleshooting and Advanced Maintenance
My Switch is Detected in RCM, but Injecting Fails!
- Payload Corrupt: Ensure the payload.bin file is not corrupted. Redownload the Hekate payload.
- Driver Conflict: On Windows, try uninstalling and reinstalling the APX Driver in TegraRCMGUI. Try a different USB port or cable.
- Jig Issue: Ensure the RCM Jig is properly seated and making contact. A quick flash then black screen means RCM was entered, but the jig failed to stay put or short the pins correctly.
How to Update Atmosphere Switch and Hekate
When a new firmware releases, you must update your CFW components before updating your EmuMMC:
- Update Files: Download the new Atmosphere and Hekate files. Copy the new files to the root of your SD card, overwriting the old files. You must also download and apply the latest Sigpatches.
- Update Firmware: Once your CFW components are updated, boot into your Atmosphere Switch EmuMMC. Use a homebrew application like Daybreak (accessed via the Album) to install the new official firmware files (which you must source and place on your SD card) offline. Never update your EmuMMC through Nintendo’s System Settings.
FAQs
What is the significance of “Sigpatches” and where do they go?
Sigpatches are necessary for the Atmosphere Switch CFW to bypass the digital signature checks performed by the system. Without them, any unauthorized file (like a homebrew app or an installed game backup) will result in a crash error upon launch. You must copy the contents of the Sigpatches package over the existing /atmosphere folder on your MicroSD card.
My EmuMMC is running, but the screen says my firmware is outdated. Why?
The EmuMMC is a clone of your original system firmware (SysNAND) at the time of cloning. If your original system was on firmware 15.0.0 when you cloned it, your EmuMMC is also on 15.0.0. To play newer games, you must manually update the EmuMMC firmware using Daybreak (as explained in the maintenance section).
Can I use my phone or a dongle instead of a PC to inject the payload?
Yes. Once your SD card is set up, you can use a dedicated payload injector dongle (like an R4S or SX Gear) or an Android phone (with an app like Rekado) to inject the Hekate payload. This makes the process much more portable and convenient after the initial setup.
Latest Post: